Tutorials
Videos with tips to progress your stamping journey.

Full Mould Tutorial
How to use negative chocolate stamps.
Video shows stamping of a full mould. Temperature details, time taken and tips detailed below.
The first two rows of cavities are stamped at normal speed. The video is then sped up and shows the total time taken at the end.
Below is what works well for me, but if you find you have different methods, and they work keep using them.
In this video I have moved the heat gun out of the way because it is very noisy. It was still too noisy out of the way, so I have removed the sound and added descriptions to the video.
Equipment used:
-
airbrush and compressor to spray the mould with coloured cocoa butter. I use a Fengda FE-183K airbrush and Sparmax TC-610H compressor.
-
Coloured cocoa butters. I use iShudKoko.
-
Heat Gun for heating the stamps. Other people have been successful with hairdryers.
-
Infra-red handheld temperature gun for checking stamp and mould temperature. I only used the temperature gun in this video to show the stamp temperature. I normally do not use one and just swirl the stamp in front of the heat gun for a set amount of time (normally about 5 seconds apart from first heat up)
-
Small and medium soft round sponges for cleaning the melted cocoa butter.
-
Kitchen towel for cleaning the stamps and sponges.
-
Stamps and a handle.
Temperatures
-
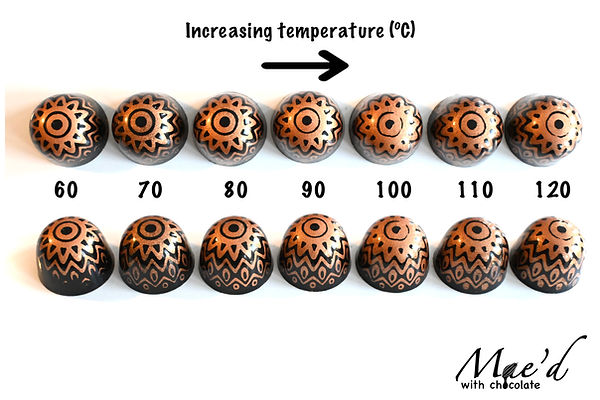
Stamp temperature - I aim for between 70 & 80 degrees C.
-
Room temperature - about 19-20 degrees C
-
Mould temperature for stamping - about 20 degrees C
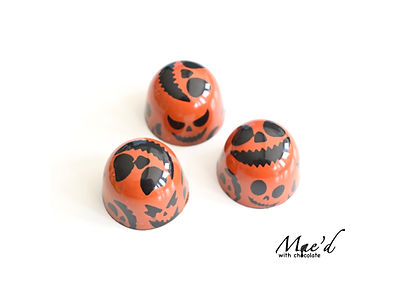
I start with a test on just a single cavity and then I start my timer to give an indication on how long the entire mould takes. This mould took me about 9 minutes to complete the stamping process. At the end of the video there is a photo of the released chocolates. There is only one that did not come out very well. I would normally expect a couple of fails out of a mould so quite pleased there was only one with the added pressure of filming the process.
The first heating of the stamp takes around 10 seconds with a steady swirling of the stamp at the end of the heat gun, and I aim to get the stamp to between 70 & 80 degrees C. This temperature may vary depending on the amount of detail on the stamp or the mould/room temperature. Less detailed stamps will allow a bigger stamp temperature range (eg swirls, lines etc).
As seen in the video I remove the stamp quickly from the cavity (less than 1 second). When the stamp is in the cavity the heat will radiate from the stamp around the cavity. Leaving the stamp in longer will cause the heat from the stamp to start melting outside of the stamps pattern, potentially loosing detail. If the stamp is used at a lower temperature, you can get away with leaving it in the cavity longer. When stamping multiple cavities at a time, the stamp will lose heat between each cavity. For each cavity you will need to hold the stamp in the cavity slightly longer (I am talking a very very small difference in time).
I use the small round sponges for cleaning. Kitchen / paper towels can also be used. Some people wrap them around the sponges or something of a similar shape and use an elastic band to keep them on.
I normally allow 2 small sponges for every 4 cavities. The first sponge is to quickly wipe the melted cocoa butter out of the cavities trying to get as much as possible. I try to wipe with very light pressure and quickly. If you wipe slowly the melted cocoa butter has a chance of warming up the bits you don’t want melting as you wipe it out. The second sponge is to clean up the smears left from the first sponge. With this wipe I try and wipe in the direction of the pattern if possible (pattern dependant). I find you can wipe with a little bit more pressure at this stage. In this video I only used 10 small sponges on a 28-cavity mould. Some stamps will melt more cocoa butter, and some stamps will melt less. This could change the number of sponges used. I could have used slightly bigger sponges which would mean using less in total, but the smaller ones give me better/precise control when cleaning and allows me to concentrate on smaller areas if needed.
After you have finished the mould, you can go back in with sponges to tidy up a bit more if you notice any smears. The smears will be very thin so should wipe off with a small amount of pressure without removing the pattern. Try not to wipe too much though.
I wipe the stamp and cleaning sponge with kitchen roll after every 4 cavities. In this video I do not wipe the stamps as much because I have 6 stamps to use, but if I was using the same stamp on a full mould, I would wipe it after every 4 cavities.